About Frame-Lock 18-inch Metal Frame
- 18" Long Light-Duty Cleat Hanger Set for Metal Frame with Security Lock
- For metal frames over 30 inches wide
- supports up to 50 pounds
- metal cleat works with most Nielsen type metal frames with a 3/8" channel
- made of extruded aluminum 1 1/8" wide by 3/64" thick
- wall standoff is 1/4 inch
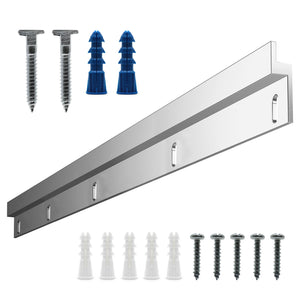
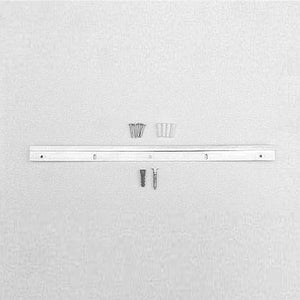
Security Metal Cleat Kit includes
- (1) 18-inch cleat - to attach to the wall
- (5) #8 x 1" screws - to attach one cleat to wall
- (5) #8 plastic anchors - if needed to attach cleat to wall
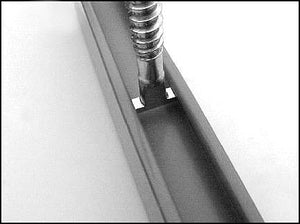
- (2) T-Head security screw - goes in wall and locks frame to wall by attaching to the metal frame channel
- (2) Security Screw Plastic Anchor - to attach security screw to wall
- ****Wrench sold separately****
Instructions
Any reasonably handy person will have no trouble hanging pictures with Frame-Lock Hangers. The first picture you tackle may take a little time, but once the installation sequence is understood, hanging speed will increase.
A basic instruction sheet is included with each shipment of Frame-Lock Hangers. Or, if you prefer, refer to our complete step-by-step Frame-Lock Hanger installation instructions below.
Don't be intimidated by the number of steps outlined in the Frame-Lock Hanger instructions. The installation process is much more straightforward and intuitive than it might appear from the written description.
- Place the frame face-down on a soft surface.
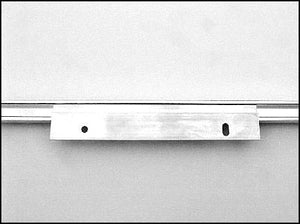
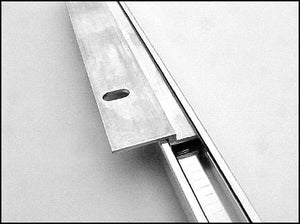
- Place one of the (6"/12"/18") aluminum brackets horizontally on the backside of the frame's top rail, with the screw holes at the top and the offset end of the bracket facing down and away from the frame. Center the bracket left-to-right on the frame and slightly down from the top edge. Make sure the bracket is level on the frame. Mark the positions of the bracket screw holes and attach the bracket to the frame using the 1/2" screws provided. Screw holes in the frame should be pre-drilled to avoid splitting the wood.
-
For Frames Using the 6" or 12" Bracket: Attach the slotted mounting plate horizontally at the center of the bottom rail, slightly up from the bottom edge, using the 1/2" screws provided. Screw holes in the frame should be pre-drilled to avoid splitting the wood. Measure from the outside edge of the frame's bottom rail to the center (top to bottom) of the slot in the mounting plate. Write down this measurement.
-
For Frames Using the 18" Bracket: Attach the two slotted mounting plates horizontally, 3" in from each side of the frame's bottom rail, slightly up from the bottom edge, using the 1/2" screws provided. Screw holes in the frame should be pre-drilled to avoid splitting the wood. Measure from the outside edge of the frame's bottom rail to the center (top to bottom) of the slot in the mounting plates. Write down this measurement.
- Mark the position on the wall where you want the center of the top of the frame to be. Use a pencil or small piece of tape for this.
- Hold the second (6"/12"/18") aluminum bracket horizontally against the wall with the screw holes at the bottom and the offset end of the bracket facing up and away from the wall. Center the bracket side-to-side on the mark you made in Step 5, with the top edge of the bracket level and approximately 3/4" below the mark (precise measurement, if required, will depend on location of frame bracket on the frame).
- Punch or mark the position of the hole at the right-hand end of the bracket on the wall.
- Drill a 3/16" dia. hole in the wall at this mark. (A 3/16" dia. hole is usually sufficient for drywall--if the plastic anchor starts to deform when hammering it in during Step 5, re-drill the hole using a 1/4" drill bit). If a wall stud is hit, use the screw without the anchor or move the bracket.
- Gently hammer one of the white plastic anchors provided into the hole in the wall until it is just flush with the wall surface. Attach the bracket to the wall using one of the 1" screws provided. Do not tighten this screw down completely yet.
- Carefully level the bracket on the wall using the screw already installed as a pivot point. An inexpensive lightweight "torpedo" level is good for this. Take care to position the wall bracket as level as possible.
- Mark for and install a white plastic anchor and screw in a second hole at the left hand end of the bracket. Depending on the length of the bracket and configuration of the screw holes, be sure at least one in the two screws is in a slotted bracket hole. Tighten down both screws completely but do not over-tighten--they should be snug, but too much force can deform the plastic anchors.
- When the bracket is screwed to the wall at both ends, hang the frame by holding it flush against the wall and slowly sliding it down until the two brackets engage.
- Check the frame for level. If not quite level, small adjustments can be made by removing the frame from the wall, loosening the bracket screw in the slotted bracket hole slightly, shifting the bracket up or down as needed, retightening the screw, and replacing the frame on the bracket.
- If you are using a 12" or 18" bracket, remove the frame from the wall, pencil-mark the position of the bracket on the wall at the bottom edge as a reference, then install the remaining white plastic anchor(s) and screw(s) and replace the frame on the wall.
- With the frame hung on the wall, lightly pencil-mark the position of the frame's outside edge on the wall at the center (left-to-right) of where the mounting plate is located on the bottom rail of the frame.
- Remove the frame from the wall.
- Transfer the measurement taken at Step 3 or 4 to the wall, making a second pencil mark up from the one made in Step 15. Erase the bottom mark.
- Drill a 5/16" dia. hole at the pencil mark made in Step 17 and gently hammer the blue T-Head plastic anchor provided into the drilled hole until it is just flush with the wall surface.
- Thread the T-Head screw provided into the plastic anchor until about 3/8" extends out from the wall surface. Start the T-Head screw first by hand and complete using a Security Wrench. Align the head to a final horizontal position.
- Again hang the frame on the wall. The T-Head screw just installed should fall inside the slot of the mounting plate on the back of the bottom rail.
- From the right-hand side, slide the Security Wrench up underneath the bottom edge of the frame and, without lifting the frame away from the wall, engage and rotate the T-Head screw clockwise one-quarter turn to a vertical position. The frame is now locked to the wall.
