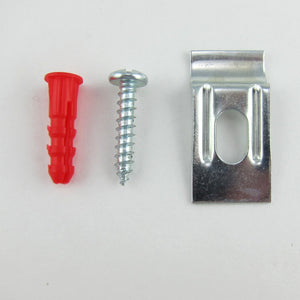
About Security Kit Lock-In Metal Frame
- Secure multi-point picture locking system
- Lock-In Security Hangers attach pictures to the wall at both the bottom and the top rails of a frame.
- For Frames up to 24" wide
- Metal picture frames do not need any hardware to be placed on the frame itself--the channel on the back side of the metal frame accepts the Lock-In wall hardware.
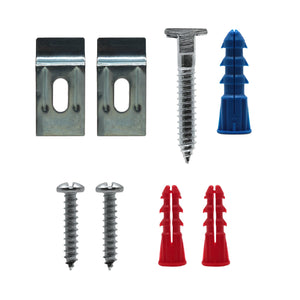
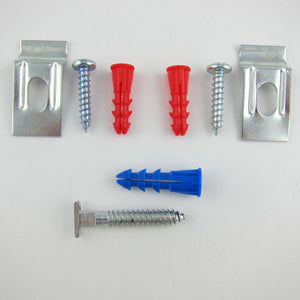
Security Metal Frame Kit includes
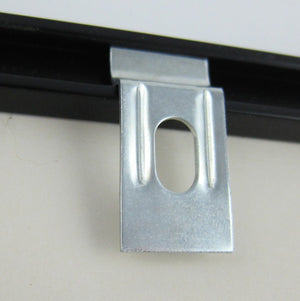
- (2) 3/4" x 1 1/2" wall brackets - to attach to the wall
- (2) #10 x 1" screws - to attach the wall brackets to wall
- (2) red or white wall bracket plastic anchors - if needed to attach wall brackets to wall
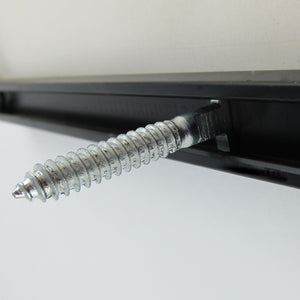
- (1) 1 3/4" T-Head screw - goes in wall and locks frame to wall by attaching to metal frame channel
- (1) Security Screw plastic anchor - to attach security screw to wall
- ****Wrench sold separately****
Description
Security Kit Lock-In Metal hardware will fit on all currently manufactured metal frames generically designated as #11 Profile moulding. This includes the metal moulding currently made by Nielsen, Clark, Designer, Alumaframe, Global Art, MCS, Decor and most OEM manufacturers. The #11 Profile category (and compatible profiles) constitute probably 95% of the current metal moulding market.
As long as the corner hardware and channel on the back side of your metal frame looks like this and the channel is 3/8" wide, Lock-In hardware will fit.
If you are installing older metal-framed pictures, you should be aware that metal frame moulding design has evolved over the years and our Lock-In T-Head Screws and Wall Brackets may not fit inside the back channel of certain older, now obsolete style metal frames (typically pre-1980 manufacture).
There are a small number of these older extrusion profiles still being made, the so-called #186 Profile and #444 Profile. These profiles have a narrower back channel, measuring about 1/4" wide, compared to the standard 3/8" wide universal channel of the #11 Profile. Lock-In hardware will not fit on #186 or #444 profile metal frame moulding.
Lock-In Hangers cannot be used on low-end crimped corner metal frames (also called "back-load" or "back-loaded" frames). Back-loaded metal frames do not have a universal channel at all and look like this at the corners.
Instructions
- Mark the desired position of the top corners of the frame on the wall.
- Drill a 1/4" dia. hole in the wall about 1" down and 2-3" in from sides of each these marks. (A 1/4" dia. hole is usually sufficient for drywall--for harder surfaces or if the plastic anchors start to deform when hammering them in during Step 3, re-drill using a 5/16" drill bit). It is very important that these two holes be as level on the wall as possible.
- Attach the two wall brackets at these holes so that the flanged ends of the brackets face up and away from the wall, using the 1" wall bracket screws and (red or white) plastic wall bracket anchors provided. Take care to hammer the anchors in gently until they are just flush with the wall surface. Do not over tighten the bracket screws.
- Hang the frame on the wall brackets so that the flanged ends of the brackets are seated snugly inside the back channel of the frame's top rail.
- Check for level. If the frame is not quite level, small adjustments are possible by removing the frame from the wall, loosening the wall bracket screws slightly, shifting the brackets up or down as needed in their slots, retightening the screws and replacing the frame on the brackets.
- With the frame hung level on the wall brackets, lightly pencil-mark the wall at the centerpoint of the frame's bottom rail where the rail's back edge touches the wall.
- For larger metal frames, an extra (fourth) mounting point should be used on the frame's bottom rail to make the frame more stable. Extra T-Head screws and anchors must be ordered separately (see above). For larger metal frames using an extra T-Head screw, make two pencil marks during Step 6, spaced an appropriate distance apart, rather than one at the midpoint of the rail and expand Steps 9-13 accordingly.
- Remove the frame from the wall.
- Measure the distance on your metal frame from the outer edge of the frame to the center of the channel (this dimension can vary with different types of metal frames). Transfer this measurement to the wall, making a second pencil mark up from the one made in Step 6. Erase the bottom mark.
- Drill a 5/16" dia. hole at the pencil mark made in Step 9 and gently hammer the (blue) T-Head plastic anchor provided into the drilled hole until it is just flush with the wall surface.
- Thread the T-Head screw provided into the plastic anchor until about 3/8" extends out from the wall surface. Start the T-Head screw first by hand and complete using a Security Wrench. Align the head to a final horizontal position.
- Again place the frame over the top wall brackets. The bottom T-Head screw should now be in position within the back channel of the frame's bottom rail.
- From the right hand side, slide the Security Wrench up underneath the bottom edge of the frame and, without lifting the frame away from the wall, engage and rotate the T-Head screw clockwise one-quarter turn to a vertical position. The frame is now locked to the wall.
