Enjoy Free Shipping on Orders Over $99 within the 48 Contiguous States!
Enjoy Free Shipping on Orders Over $99 within the 48 Contiguous States!

S-HWR-116
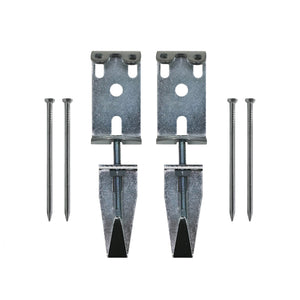
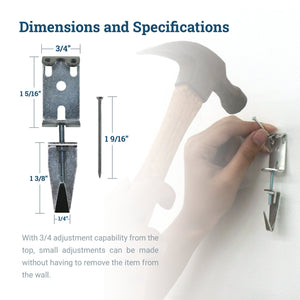
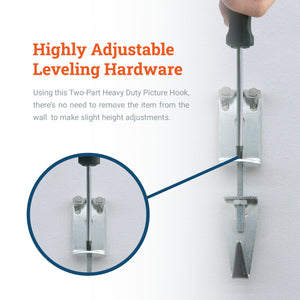
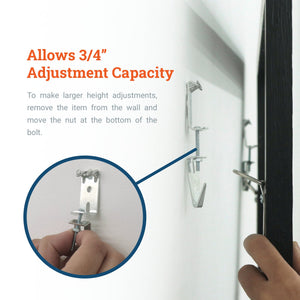
Adjustable J-Hooks are heavy-duty two-part picture hooks that allow height/level adjustments without removing the item hung on the wall. Boasting a 3/4" adjustment capacity, a J-hook’s lower section moves up and down and its upper section is adjustable while the hook is under load. This is thanks to a unique design with an angled nail collar that can provide significant support.
Position D-ring or strap hangers at the top corners of your picture frame. Align them vertically at an equal distance from the frame's top edge and far enough down to hide the J-Hooks once the picture is hung on the wall.
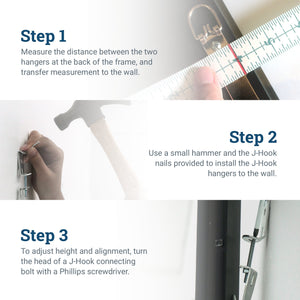
Measure the distance between the center points of the two hangers and mark this measurement on the wall. The marks should be reasonably level with each other and spaced apart at the same distance between the hangers on the frame.
To add strength and holding power to the hooks, use anchors and screws in wall studs. Note that this step is optional. (See second set of instructions below)
Hammer the four nails provided into the marks to install the J-Hooks.TIP: There is approximately 3/4" adjustment capacity on a J-Hook, so the hooks need not be perfectly level upon installation.
Hang the frame on the hooks.
You can fine-adjust the frame to level without taking it off the wall by turning the head of a J-Hook connecting bolt with a Phillips screwdriver. Insert the screwdriver through the opening on the top side of the hook.
For larger adjustments, remove the frame from the wall and move the hex nut on either J-Hook connecting bolt up or down as required.
With screws and anchors (optional)
Follow steps 1-2 above.
Drill or punch two 3/16" diameter holes in the positions you marked. These holes indicate the position of the screw hole in the J-Hook upper sections.
Install two #8 white plastic anchors (not included) by gently hammering them into the wall holes. The anchor tops should be just flush with the wall.
Attach the J-Hooks to the wall by inserting the screws (not included) into the anchors. Once secure, you can hammer in the two J-Hook nails for each hook to add holding power.
Hang the frame on the J-Hooks.
Adjust as per steps 6 & 7 above.
