Enjoy Free Shipping on Orders Over $99 within the 48 Contiguous States!
Enjoy Free Shipping on Orders Over $99 within the 48 Contiguous States!



S-HWR-191
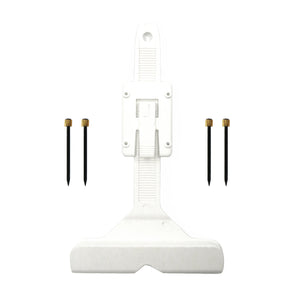
The T-strap adjustable hanger perfects hanging with picture wire with its groundbreaking adjustability and durability. Featuring a heavy-duty wall mount and a T-shaped strap designed to keep frame wire stable, this two-part hanger is the ultimate picture hanging tool for picture wire. The teeth on the hanger strap measure 1/16”, providing incredible precision when you adjust a picture. Tested and made with powerful nylon fiberglass, this hanger can carry beyond its standard weight capacity with the help of a Molly bolt.
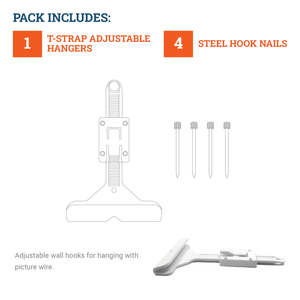
T-strap adjustable hanger for hanging picture frames with picture wire
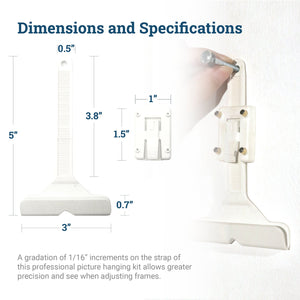
Measures 5" long and 3" wide, wall mount measures 1.5” long and 1” wide
Teeth portion measures 3.8” long and 0.5” wide
Holds up to 150 lbs, or up to 325 lbs with a Molly bolt
Picture hanging kit includes four (4) Steel Hook Nails
Use in conjunction with picture wire
Nylon fiberglass combination
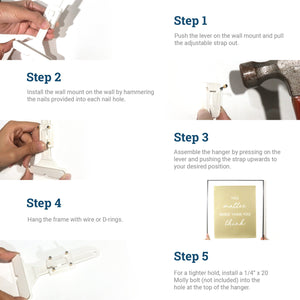
Push the lever on the wall mount and pull the adjustableT-strap out.
Position the wall mount on the wall. Then install it by hammering the nails provided into each nail hole.
Assemble the hanger by pressing on the lever and pushing thehanger strap upwards to your desired position. You can adjust the hanger up to 1 1/2" up and down.
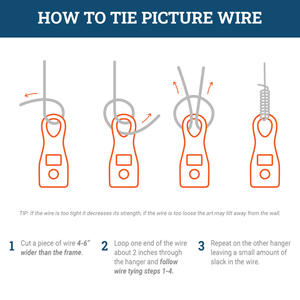
Hang the frame using picture wire. (See instructions for picture wire in the listing images above.) Adjust the height on the hanger as you like.
For an even stronger grip, install a ¼” x 20 Molly bolt (not included) into the hole at the top of the hanger.
6. Reassemble the adjustable T-strap and reposition it on the wall.
7. Install the Molly bolt and secure the strap using a screwdriver.
